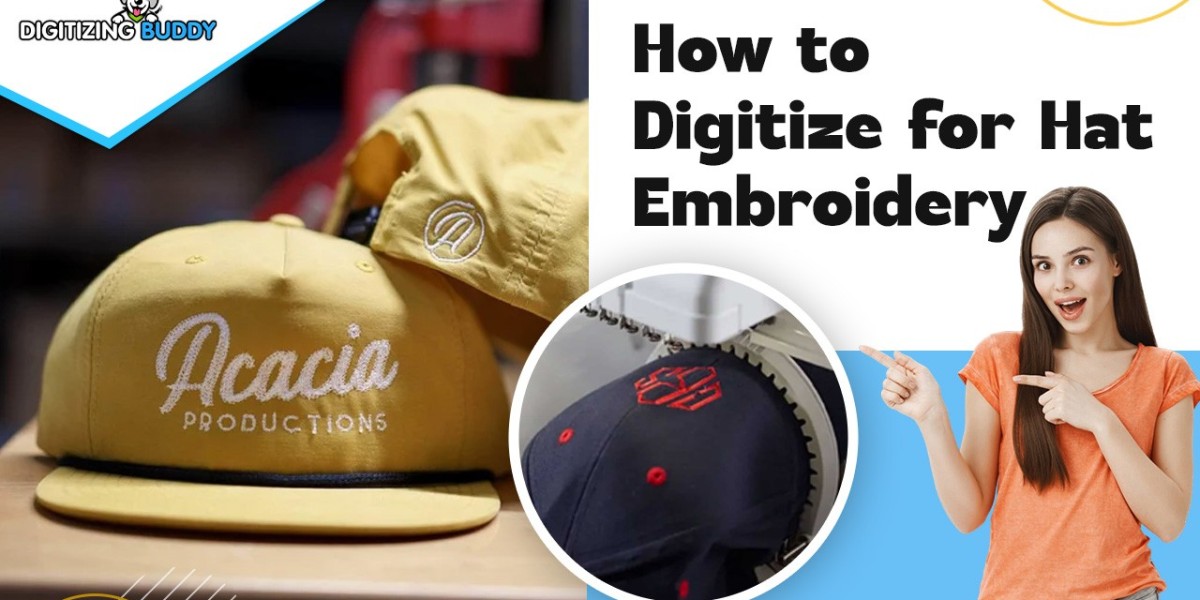
Custom embroidered hats are everywhere—from branded corporate caps to trendy streetwear. But if you’ve ever tried digitizing a design for a hat, you know it’s not as simple as slapping any artwork onto fabric. Hats have curves, seams, and stiff structures that can turn a great design into a messy disaster if not handled correctly.
The good news? With the right techniques, you can avoid puckering, thread breaks, and misaligned stitches. Whether you’re a beginner or a seasoned embroiderer, this guide on how to digitize for hat embroidery will help you get professional results every time.
Understanding the Challenges of Hat Embroidery
Before diving into digitizing, it’s important to recognize why hats are trickier than flat fabrics. The curved surface of a cap means stitches can distort if not properly planned. The center seam on structured caps can also interfere with designs, causing gaps or misalignment. And because hats are often made of thick materials like twill or polyester, thread tension and stitch density must be adjusted to prevent stiffness or warping.
That’s where smart digitizing comes in. By optimizing your design files for hats, you can avoid these common pitfalls and create crisp, durable embroidery.
1. Keep Designs Compact and Centered
One of the biggest mistakes in hat embroidery is making the design too large or placing it too high. Unlike flat garments, hats have limited space—especially on the front panel. A good rule of thumb is to keep designs under 2.5 inches tall for standard caps. Any larger, and you risk the design wrapping awkwardly around the curve or colliding with seams.
Centering is also crucial. If your design is off by even a few millimeters, it’ll look crooked once stitched. Always use hoop alignment guides and mark the center point before stitching. Some embroidery machines have built-in hat hoops with alignment lasers—use them if available.
2. Simplify Complex Designs
Detailed artwork with tiny text or intricate shading might look great on paper but can turn into a blurry mess on a hat. Thick materials and curved surfaces don’t handle fine details well. Instead:
- Use bold outlines – Thin lines can get lost; thicker satin stitches hold up better.
- Avoid small text – If you must include text, keep it at least 0.2 inches tall and use blocky fonts.
- Reduce stitch count – Too many stitches make the design stiff and heavy. Simplify gradients and textures.
A clean, slightly simplified version of your design will look sharper and last longer.
3. Adjust Stitch Density for Comfort
Hats are worn close to the head, so bulky embroidery can feel uncomfortable. High stitch density (too many stitches packed tightly) makes the design stiff and can cause puckering. To fix this:
- Lower the density – For fills, 0.4mm to 0.6mm spacing works well.
- Use fewer underlay stitches – Too much underlay adds unnecessary thickness.
- Choose lighter backing – Tear-away stabilizer is great for hats, but if the fabric is stretchy, a cut-away stabilizer provides extra support.
The goal is a design that looks solid but remains flexible enough to move with the hat.
4. Account for the Center Seam
Structured caps have a seam running down the middle, which can disrupt embroidery if ignored. If your design crosses this seam, the stitches may gap or pucker. Solutions:
- Avoid stitching directly over the seam – Shift the design slightly to one side.
- Use a split fill technique – If the design must cover the seam, digitize it in two halves that meet cleanly.
- Test on a sample hat first – Always do a trial run to see how the design behaves on the actual cap.
5. Puff Embroidery? Yes, But Be Careful
3D puff embroidery looks amazing on hats, but it requires extra attention. The foam backing raises the stitches, but if not digitized correctly, the design can look lumpy or uneven. Tips for perfect puff embroidery:
- Use wider satin stitches (at least 4mm) to cover the foam properly.
- Avoid small details – Puff works best with bold letters and thick outlines.
- Trim excess foam carefully after stitching to prevent fraying.
Puff embroidery adds a premium touch, but it’s not ideal for every design. Stick to simple, high-impact logos for the best results.
6. Choose the Right Thread and Needle
Thread and needle selection can make or break your hat embroidery.
- Thread – Polyester thread is durable and resists fading, making it ideal for hats. Rayon has a nice sheen but isn’t as strong.
- Needle size – Use a sharp needle (size 75/11 or 80/12) to penetrate thick cap materials cleanly. Ballpoint needles work better for stretchy fabrics.
- Thread tension – Test on scrap fabric first. Too tight, and the design puckers; too loose, and stitches look sloppy.
7. Hooping Matters—Don’t Skip It
A poorly hooped hat will ruin even the best digitized design. For best results:
- Use a hat hoop or cap frame – These hold the fabric taut without distorting the shape.
- Check alignment twice – Misaligned hooping leads to crooked embroidery.
- Don’t over-tighten – Stretching the fabric too much can cause warping.
If you don’t have a hat hoop, some flat hoops can work, but they require extra care to avoid shifting.
8. Test, Adjust, Repeat
Even experienced digitizers make adjustments after the first test stitch. Always run a sample on a spare hat or similar fabric to check:
- Stitch quality – Are there thread breaks or skipped stitches?
- Placement – Is the design centered and aligned correctly?
- Comfort – Does the embroidery feel too stiff?
Make small tweaks to the digitized file until you get it just right.
Final Thoughts
Hat embroidery doesn’t have to be frustrating. With smart digitizing techniques—like simplifying designs, adjusting stitch density, and perfecting hooping—you can create professional-quality caps every time. The key is understanding how hats differ from flat fabrics and adapting your approach accordingly.
Whether you’re embroidering for a business, a sports team, or just for fun, these hacks will save you time, thread, and headaches. Now grab your favorite cap, fire up your embroidery machine, and stitch something awesome!